
Digital Painting: Creating Texture
LEARNING TARGETS:
» I can use and manipulate layers and masks in Adobe Photoshop.
» I can adjust brushes to create a specific texture using Adobe Photoshop. » I understand the responsibilities and ethics associated with publishing to the internet
» I can adjust brushes to create a specific texture using Adobe Photoshop. » I understand the responsibilities and ethics associated with publishing to the internet
EXPECTATIONS:
» CREATE: Using the eye dropper, create a pallet of main colors needed.
» CREATE: Reproduce the reference image by painting in the provided area.
» REFLECT: Document the whole process in your blog and reflect what you learned.
» CREATE: Reproduce the reference image by painting in the provided area.
» REFLECT: Document the whole process in your blog and reflect what you learned.
Here is the template for painting the texture . . . https://drive.google.com/file/d/0B9jMyW0QKhnWQTMyMDJDVi1vZlk/edit?usp=sharing
I started by using the 'Cutout' filter on our sample switch to reduce to basic colors. Kind of like squinting.
- Duplicate Layer
- Unlock Layer
- Apply Filter

I started by filling in the entire work space with a mid tone.

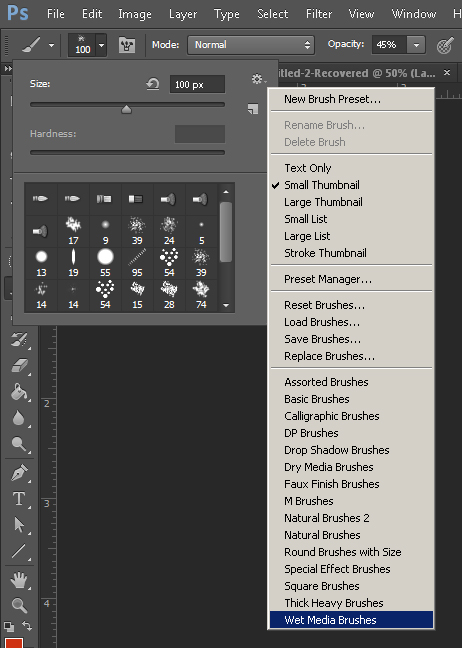
Then I attempted to reproduce the reduced texture. I used a 'Wet Media Brush'
I then choose 'Rough Ink' . . .


I used the following settings:

- Duplicate Layer
- Unlock Layer
- Apply Filter
This gives us a more blurred version of the swatch without the details.
Here I used a combination of multiple brushes with varied opacity and flow. I used 'splatter' quit a bit.


For the final details, I used any and every bush I felt worked. Then I switched to a 'Dry' brush. My final painted swatch is not perfect, but a 'good' representation of the example. The point of the exercise is to really understand how to create detailed texture.


![]()
0 Response to "Digital Painting: Creating Texture"