Create a Cool Vector Robot Character in Illustrator
 |
Original Link by Chris Spooner
Looking to learn the basics of Adobe Illustrator? In this tutorial we'll use various tools and techniques to create a simple vector robot character. With this robot being made of lots of basic shapes it makes for a great tutorial for beginners to get to grips with the Illustrator application.
Here's the simple vector cartoon robot character we'll be making in this tutorial. It's essentially made up of lots of basic shapes such as rectangles and circles, but we'll bring it to life with varied stroke weights, gradient fills and subtle highlights.
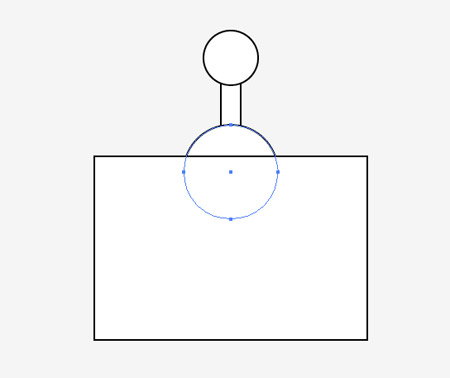
Open up Adobe Illustrator and create a new document. Select the rectangle tool and draw the basic head shape and an antenna. Switch to the circle tool and add shapes to either end of the antenna. Press Ctrl+Shift+[ with the lower circle selected to send it underneath the rectangle.
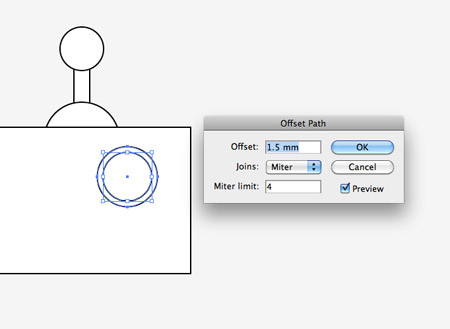
Draw a circle to form an eye, then go to Object - Path - Offset Path. Enter 1.5mm in the Offset option field to create a slightly larger circle aligned exactly to the original.
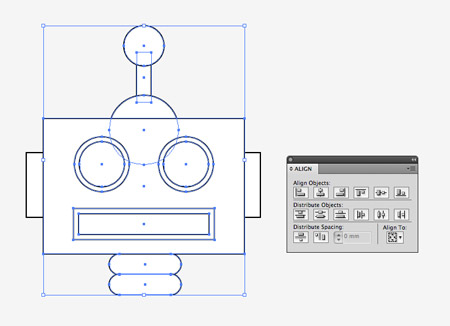
Use a mix of basic shapes such as rectangles, circles and rounded rectangles to finish off the robot head with a range of features. Group pairs of elements like the eyes then align everything up centrally.
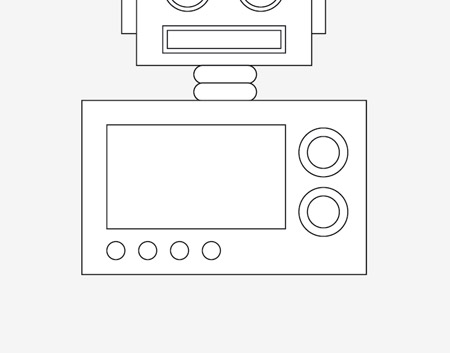
Add various buttons and dials to the body of the character with more basic shapes, keeping everything centered with the head.
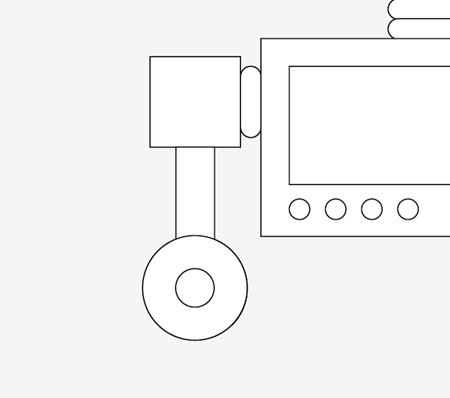
Draw the basic outline of the hand with a large circle. Copy {Ctrl} + { c } and Paste in Front {Ctrl} + { f } , then hold ALT and Shift while scaling the new circle down.
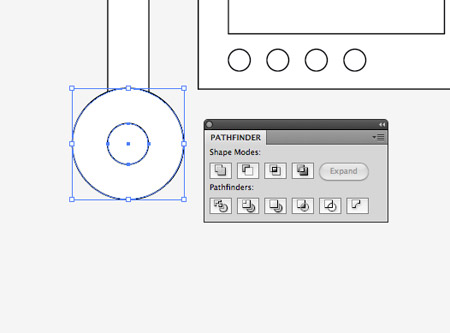
With both objects selected use the Subtract option from the Pathfinder pallete to punch out the smaller circle from the larger circle. To activate the Pathfinder {Shift} + {Ctrl} + {F9}
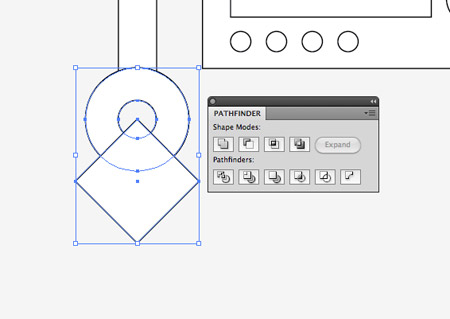
Draw a square, rotate it by 45 degrees then position it centrally over the circular ring. Toggle on Smart guides to make the alignment easy {Ctrl} + {u}. Use the Pathfinder once again to punch out this square selection.
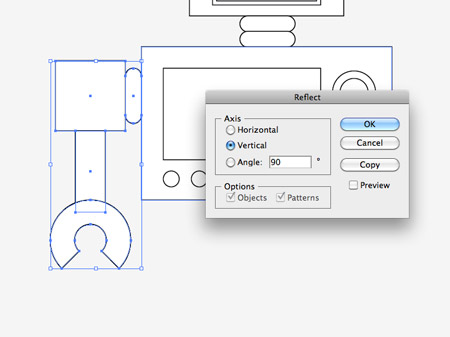
Select all the shapes that make up an arm, copy and paste in front. Go to Object - Transform - Reflect and select the Vertical option to flip the objects, then position them on the opposite side.

Even though we've only used standard tools with just a couple of custom shapes our robot is starting to look pretty cool!
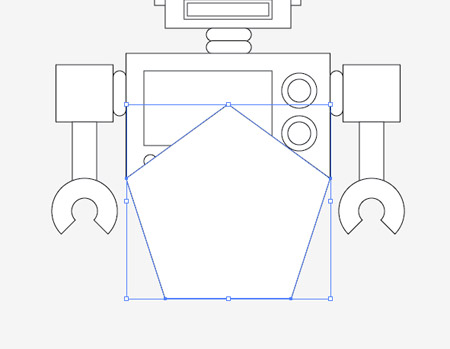
Grab the Polygon tool and click and drag a shape onto the artboard. Before releasing the mouse increase or decrease the number of points to 5 with the keyboard cursor keys.
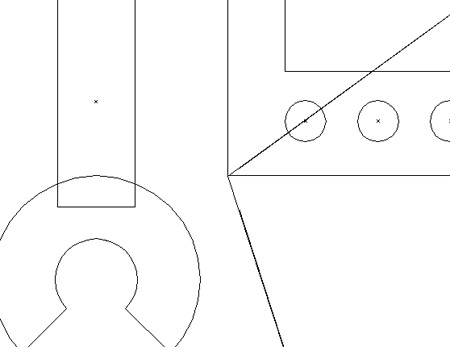
Align this pentagon exactly with the lower corners of the body rectangle. Toggle on Outline mode {Ctrl} + { y } for a clear and precise view.
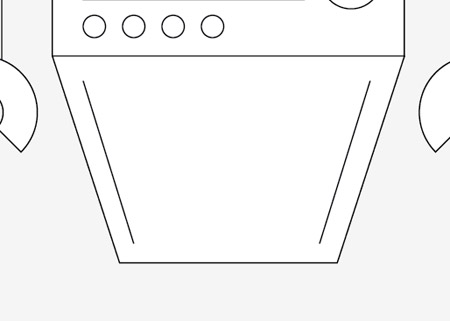
Draw a diagonal line running parallel to the lower half of the body with the line tool. Copy/Paste and flip the line and position the duplicate on the opposite side.
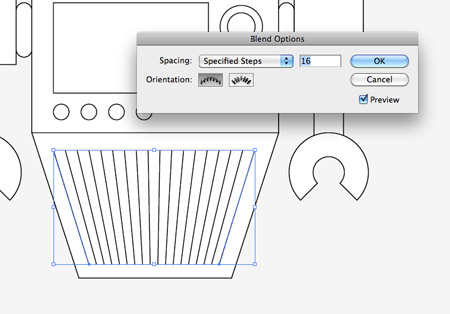
With both lines selected go to Object - Blend Make, then head back to Object - Blend - Blend Options. Change the Spacing to Specified Steps then alter the number to suit.
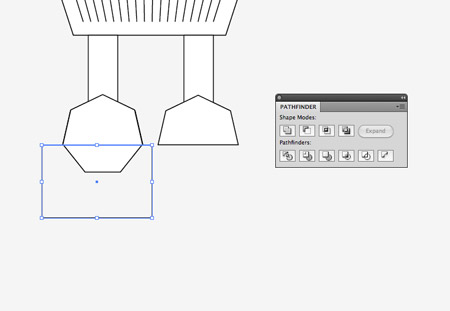
Finish off the robot with a couple more rectangles and heptagons as legs and feet, then clip off the bottom of the feet with a temporary rectangle along with the Pathfinder tool.
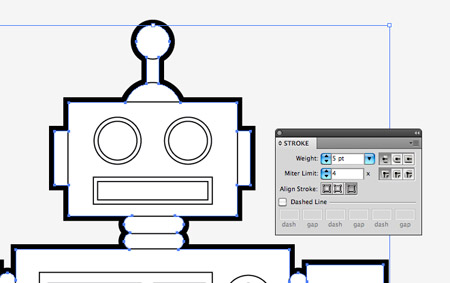
Draw a selection around all the shapes that make up the robot, copy and paste in front then click the Merge option from the pathfinder palette. Clear out the fill and bump up the stroke to 5pt aligned to the outside.
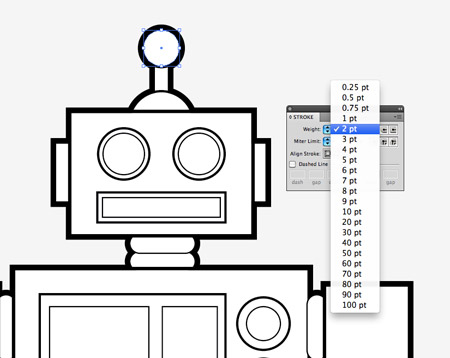
Go through each individual element and adjust the stroke weight according to its prominence in defining the profile of the character. Use 3pt for important objects like the head, 2pt for no-so-important elements and 1pt for the finer details.

Now we can begin to add some colour. Give each shape a colour fill. I'm using two tones of grey for the body parts, red for key areas and blue or yellow for buttons and dials.
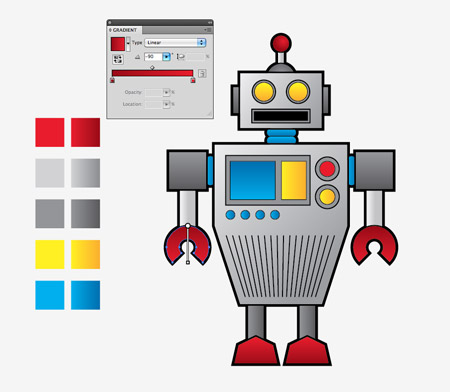
To add a little more depth to the otherwise flat design, we can switch out the solid fills with cool gradients. Create swatches for each of your colour selections with a light-dark gradient tone and replace the fills. Adjust the angle of the gradients where necessary with the Gradient tool.
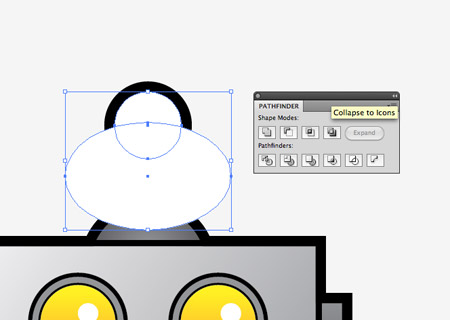
We can also add more depth by creating a series of subtle highlights. Copy and paste a duplicate of the antenna and fill it with white. Draw a temporary shape that cuts through the circle then clip out the shape with the Pathfinder palette.
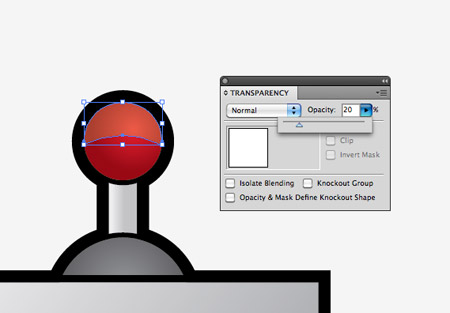
Change the opacity of this clipped shape to around 20% to create a soft reflection which gives the impression of a shiny or glossy material.
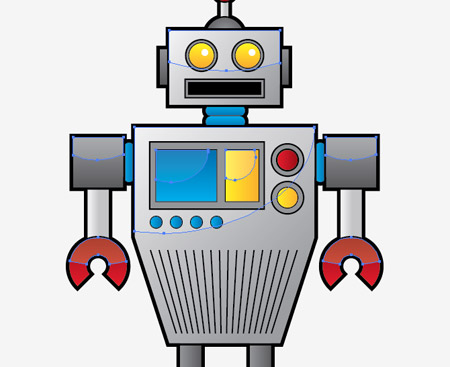
Repeat the process for each shape across the robot's body to add subtle light reflections to add more depth and a touch of realism to the design.
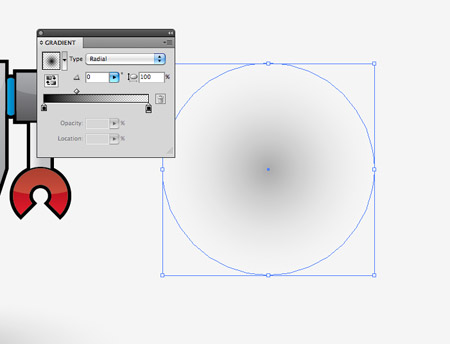
Finish off the design with a little shadow. Begin with a circle filled with a soft grey to transparent gradient.
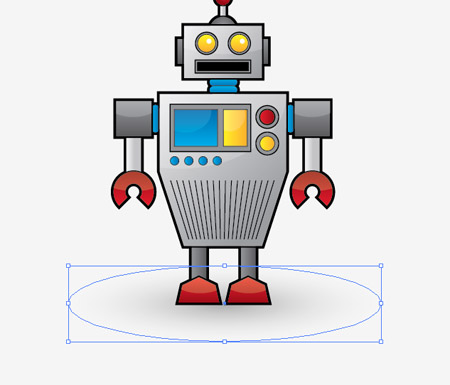
Squash the shape down and position it under the robot's feet. Use the shortcut {Ctrl} + {Shift} + { [ } to send the shadow to the bottom of the stack.
This leaves our cool retro style vector robot character complete. Even though it's made from basic shapes and simple color fills those varied line weights, gradients and highlights really help bring it to life and lift the character from the screen.


![Droste[1]](http://upload.wikimedia.org/wikipedia/commons/6/62/Droste.jpg "Droste[1]")