LEARNING TARGETS:
» I can use rulers and guides in Adobe Photoshop.
» I can blend black to white SMOOTHLY using a brush in Adobe Photoshop. » I understand the responsibilities and ethics associated with publishing to the internet
EXPECTATIONS:
» CREATE: Paint a Grey Value Scale using Photoshop in a 5 X 7 inch document at 300 DPI.
» REFLECT: Document the whole process in your blog and reflect what you learned.
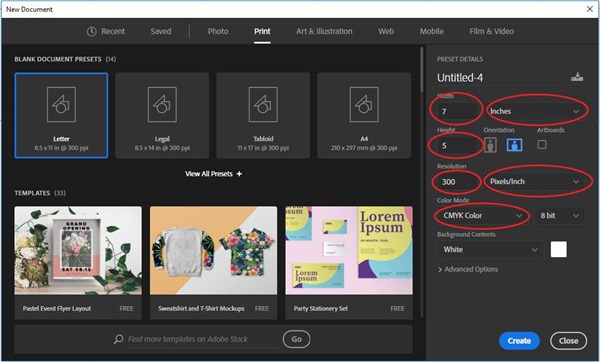
Create a new document with a resolution of 300 DPI, with a size of 5 X 7 inches.
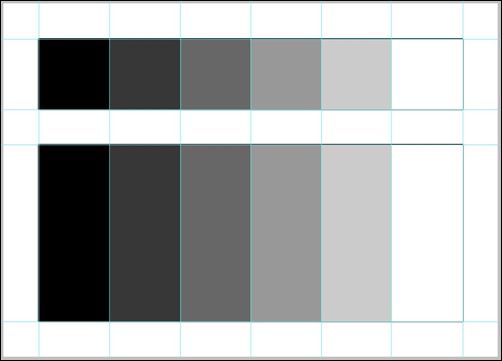
Using the ruler, setup 6, 1 inch squares, 1/2 inch from the edge.
Show Rulers by pressing {Ctrl} +{r}
Create a new layer, label it Reference Layer, and fill in each square with the appropriate values. Use the Rectangular Marque Tool {m} on the keyboard to active to select the area, assuming Snap is active, it should line up perfectly.
It should look something like this.
In a new layer, label it Blend Layer, create a rectangular value scale 1/2 inch below the top one.
Hide the background.
Using the Text Tool, add the word Brightness and its corresponding percentage.
Change the size and font as desired.
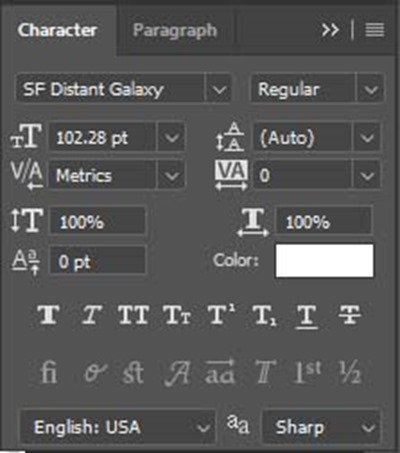
To open up the character attribute menu, Windows > Character Make sure it is checked.
This window should appear.
It should look something like this . . .
Create a layer mask for all the value blocks in the Blend Layer. Using the Rectangular Marquee Tool, select the all the value blocks in the Blend Layer. Once selected, add a layer mask.

It should look like the Blend Layer Here.
In the Blend Layer, blend the black smoothly to white. Use a large brush with a soft edge and set the Flow to something low, like 1-4%. Use the eye dropper to pick the value that you want to work with and blend. Does that make sense? It should look like the sample below.
This is what your finished project should look like.


0 Response to "Digital Painting: Grey Scale / Value Scale"